Print the test clip and learn your tolerance
Three steps and about fifteen minutes: print the clip, push the peg in, read your number. Every tool with a clearance slider takes that number, and its parts come out the right size.
The short version
- 01Print the test clip.
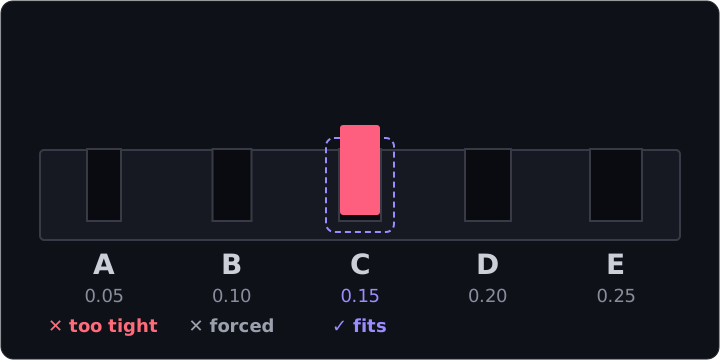
- 02Push the peg into slot A, then B, then C. Stop at the first slot it goes into with light thumb pressure.
- 03Read the number under that slot and set the tool's clearance slider to it.
1. Print the clip
The clip is a 40 mm bar with five slots, each leaving 0.05 mm more on each side of the peg than the last (0.10 mm wider), and a test peg. Twelve minutes, about two grams.
- 01Open the test clip, go to Export and press Download STL.
- 02Slice it with the profile you always use. A test in a different profile tells you nothing about yours.
- 03Print it flat on the bed. No supports, no brim.
- 04Let it cool fully. Warm PLA is a different size.
2. Push the peg in
Find slot A first. It has one dot at its closed end, and the corner of the bar next to it is cut off. Slot E has five dots.
- 01Push the peg into slot A with your thumb. Do not rock it and do not force it.
- 02If it does not go in, try slot B, then C, and so on.
- 03Stop at the first slot it goes into and stays in.
3. Read your number
| SLOT | FEEL | SET TOLERANCE TO |
|---|---|---|
| A | Peg won't go in at all | ±0.05 mm |
| B | Goes in with real force | ±0.10 mm |
| C | Light thumb pressure, stays put | ±0.15 mm |
| D | Drops in, slight rock | ±0.20 mm |
| E | Falls straight through | ±0.25 mm |
The FEEL column is how each slot feels on one typical printer. Yours will differ, so go by your own thumb: take the first slot that fits and use the number on its row. It is the gap on each face of the peg, the unit every clearance slider takes.
Set the clearance slider to that number before you export. Some tools call it Fit, Lip or Bin clearance. Each tool has its own slider, so set it in each tool that has one. Keep the number: it stays true until you change printer, filament or slicer profile.
If it still binds
Check the first layer before you change the tolerance. Elephant's foot flares the bottom two layers outward and makes an otherwise correct part feel tight only at the base. Scrape it, or tune your Z offset, and print the clip again.
Why this works
Extrusion width, nozzle temperature and the squash of a first layer all add material where the model has none. On most machines a slot modelled at 24.0 mm measures between 23.6 and 23.9 once it's cool. The error is small, consistent, and the reason parts bind.
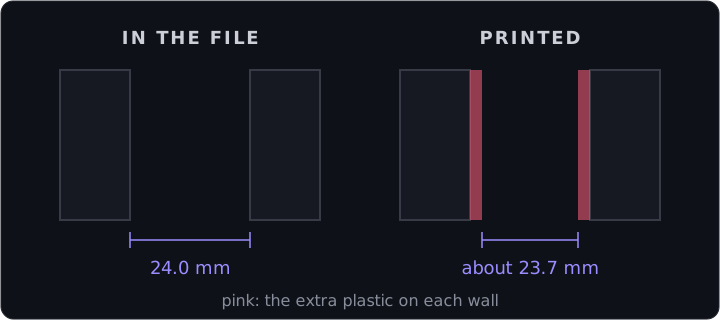
The test clip measures that error once, and the clearance slider adds it back to every mating face.